Showing posts with label auckland. Show all posts

Sunday, March 19, 2017

I Shall Return, NZ!

My flat in Auckland, New Zealand (Nov 2014)
I left New Zealand upon completion of my postgraduate studies in November 2014. After more than 2 years away, I finally get a chance to visit my alma mater in Auckland. The wedding of my nephew Neeko later this year opens an excuse for me to go there with my family.

See you soon, Aotearoa!

Saturday, June 20, 2015

VIDEO: How to Save Money in Auckland


This video from Hostelworld, shot in 2011, brings back good memories of my postgraduate life in Auckland. Colm Hanratty shares tips on how to save money in Auckland. Here they are:

1. Use the Citylink Bus to get around the city center for free. However, it is only free with a valid AT card.
2. You can bring your own drinks (i.e wine, beer, soda, etc.) in BYO restaurants.
3. Enjoy the parks in the city center, such as Albert Park and Auckland Domain.
4. Shop at the Victoria Park Market. Although Auckland is not really known for its bargain deals.
5. Check out the free museums, particularly the Auckland Art Gallery and the Auckland War Memorial Museum.

The video is so nostalgic. Especially the clip showing Albert Park--the park I crossed almost everyday during my stay.

Wednesday, May 27, 2015

Wine Tasting at Waiheke Island

Enjoying CabSav with my nephew Neeko.
If you like drinking wine or want to learn about it in Auckland, you can go wine tasting at nearby Waiheke Island. My friends and I went on a half-day wine tour, which included wine tastings at three vineyards, last November 2014. We got a discounted coupon from Around Waiheke Tours on GrabOne for NZ$59 each (from published rate of NZ$119). 
We bought separate tickets for the ferry ride from Auckland to Waiheke and back. You can choose between Fullers or Explore. We chose Explore because it also had a special rate on GrabOne. We got our roundtrip tickets for only NZ$18 each (regular fare is NZ$36).
We rode the 9:30am ferry at Auckland Ferry Terminal. The trip to Waiheke took roughly 40 minutes. When we arrived at the Matiatia Ferry Terminal, we transferred to the Around Waiheke Tours bus.
Our first winery stop was Peacock Sky Vineyard.
This was my first wine tasting ever so I was both amused and intrigued with the table setting. Apart from the wines, they provide water to cleanse your palate after each tasting. They also prepared food to pair with each glass of wine.
At Peacock Sky, we tasted their Pinot Gris--a white wine, which was paired with a white creamy soup. Next, we sampled their Rose--a pink colored wine. This was paired with a sausage. Our third wine was a traditional Merlot, which they paired with chicken. The last wine we tasted was their Cabernet Sauvignon, and they paired it with chocolate. This was my personal favorite because it really tasted like a liquid black forest cake, which was exactly what the sommelier described it to be. Anyway, after a few minutes, the alcohol kicked in and I was woozy boarding the tour bus.
The next vineyard we visited was Te Motu. This time, the setting for the wine tasting was outdoors. We were blessed with sunny weather that day, and so Te Motu's cool white wines tasted refreshing. Unlike Peacock Sky, there were no food pairings. Instead, we washed our palate with glasses of water.
Wine tasting at Te Motu with other tourists.
At the vineyard with Grace and Lara.
The vineyard at Te Motu.
Our last stop for the wine tasting tour was The Batch Vineyard. 
This difference with this vineyard was the sommelier took us around the winery while we tasted the different wines. He showed us the vats, tanks and presses where the grapes undergo the fermentation process.
Once fermentation has finished, the wines are placed in oak barrels to complete their maturation.
By the end of the tour, I had drank 12 glasses of various red and white wines, that I must admit made me a bit tipsy right after. But our group just scratched the surface, in terms of wineries. Waiheke is home to over a dozen vineyards. They say New Zealand is better know for its white wines, especially their pinot gris, but what do I know. I prefer reds anyway. One thing is for sure though, if you enjoy wines and are staying in Auckland, you must make a trip to Waiheke Island.

PS: You don't have to take the wine tasting bus tour if you don't want to. You can bring your car or bike on the ferry, or to make it easy, you can rent a car or bike when you get there. A lot of people also spend the whole weekend in Waiheke and stay in baches. For more information about the island, visit Waiheke.co.nz.

Sunday, April 19, 2015

MTB Biking in North Auckland (Woodhill Mountain Bike Park)

I'm not a mountain biker, but when I was invited by my friend to try it out at the Woodhill Mountain Bike Park, I thought to myself, 'What the heck, I'm in New Zealand, let's do it!' I mean, if I was going to try mountain biking (again) I might as well do it in beautiful, scenic, fresh and clean New Zealand, right?! RIGHT?!
Woodhill Mountain Bike Park is located just 40 minutes away (by car) northwest of Auckland CBD, at the ridges of the Woodhill Forest. It is a full service MTB park complete with a pro shop, a drinking station, and a work shop. The park's regular hours are from 7am to 5:30pm.
Woodhill Mountain Bike Park is huge. There are 68 trails in the forest, totalling over 100 kms of bike tracks. The park has recommended loops for short distances (6 kms), medium distance (10 kms) and long distances (15 kms). The park rules on safety are simple and straighforward:
  • All bikers must register before entering any of the trails.
  • No helmet means no ride.
  • Bikers should carry with them their mobile phones and a map of the park.
  • Bikers should familiarise themselves with the forest roads marked on the map, so that they can communicate their location in cases of emergency.
  • Bikers should only ride trails marked on the park map.
  • Bikers should ride within their limits and respect the stunt ratings of each trail. The rating scale is from "X" (easy) to "XXXXX" (extremely difficult).
  • Call 111 in case of emergency.
The Day Pass at Woodhill MTB park is pegged at NZ$8. Most bikers bring their own mountain bikes. But for those who visit unprepared, the park fortunately offers a full range of bikes for rent. Bike hire for a hard tail is NZ$30 for the first hour, and NZ$5 every succeeding 20 minutes. Full suspension bikes are more expensive at NZ$85 for four hours, and NZ$20 every succeeding hour. The prices are steep, so it is best to bring your own mountain bike to the park.
You can also rent bike accessories like helmets for NZ$5 and bike lights for NZ$25. Here I am with my friend Justinn Valerio. 
We visited the park in May (that's Autumn in New Zealand). I was hesitant to join that time because of the cold and rainy weather, but my friends said they preferred mountain biking during this particular season. Apparently, serious mountain bikers like it when the soil is wet, as the knobby tires have a better grip of the track. Mas makapit daw. Mas madaling umakyat. 
Anyway, I thought I was going to freeze to death. It was chilly. But I actually, later on, appreciated the cool and crisp weather. I didn't sweat as fast compared to when I went mountain biking in Timberland Heights in San Mateo, Rizal. My God, I remembered that time I tried the trails in Timberland, I almost passed out due to the extreme heat.
Not worrying so much about the heat and dehydration in Woodhill Forest made me get to appreciate the scenery so much more. While we were pedalling up the hill, I got to enjoy the view of the tall trees and other lush greenery offered by Woodhill Forest. I appreciated how the keepers maintained the park.
Unfortunately, I have no picture of the tracks and trails for the simple reason that I wasn't able to take any photos while going down the mountain. I hung on to the handlebars for my dear life. What my friends promised what was supposed to be an easy trail (a walk in the park, they asserted) turned out to be an extremely difficult ride for a newbie like me. At one part, I slammed right into a tree while speeding downhill. It's a good thing I came out of it with only a bruise on the chest.
Anyway, when we got back the entrance, we rested at the drinking station and waited for the other bikers to get back. Later on, we went over to the wash area and cleaned our muddy bikes. We were done by lunch time.
Anyway, minor MTB accident aside, I really enjoyed my adventure at Woodhill Mountain Bike Park. If you're interested to go mountain biking in Auckland, this is a great place to start. Afterwards, you can explore the other mountain bike parks in New Zealand--and there are many more!

Stay safe on the trails, MTBer!

Thursday, September 18, 2014

Skydiving in Auckland

Skydiving was on my bucket list for the longest time, and where else better to do it than in New Zealand, right? I did mine with Skydive Auckland late last year (2013). I originally planned to do it in Lake Wanaka near Queenstown, but it got cancelled twice due to strong winds. So that's my first tip. Skydiving is a weather dependent activity. You have to reserve at least two days for it. If it gets called off on the first day, at least there's another opportunity for it the second day.

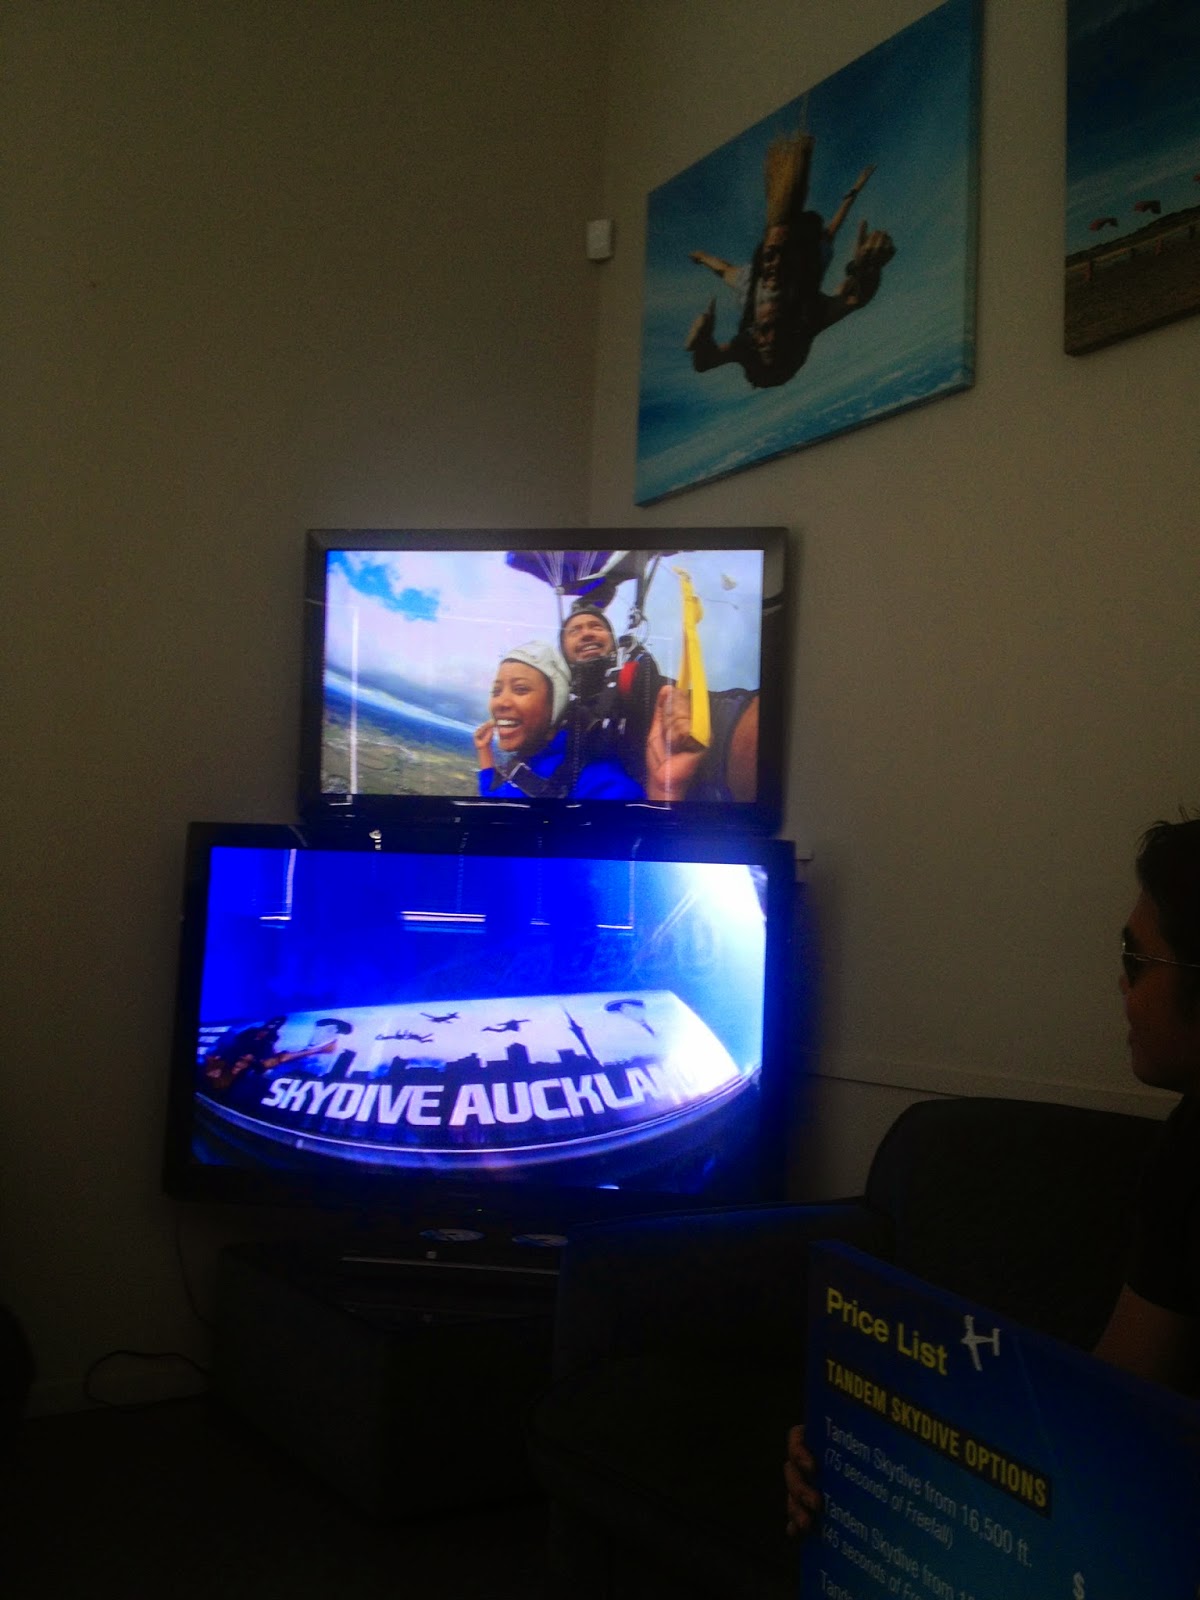
Skydive Auckland offers three heights. 9,000 feet that gives you 25 seconds of free fall; 13,000 feet which gives you 45 seconds of free fall; and 16,500 feet which gives you 70 seconds of free fall. I chose to jump at 13,000 feet. The standard price is NZ$325, but I got mine at a discounted rate of NZ$255 on BookMe so I suggest you regularly check their page for deals in case you're interested on jumping with SkyDive Auckland.

Exclusions
Unfortunately, skydiving is not for everyone. It is not recommended for those with any of the following:
a. Pregnant
b. Scuba dove the last 24 hours
c. Nasal or sinus congestion
d. Have a cold or flu
e. Have problems equalizing pressure in ears
f.  Severe motion sickness, asthma or allergies
g. Heart conditions or epilepsy
h. Shoulder, knee, back or neck injuries

Step by step
So what happens when you choose to tandem skydive? Well, here's my experience.
1. First, you are led to the briefing room where they will play an instructional video. The presentation will, among other things, teach you how to position your body when you jump from the plane.
2. Next, they will measure your weight.
3. Afterwards, you put on a jumpsuit.
4. And then, your instructor will assist you in gearing up. He'll help you put on the harness and give you your hat and goggles.
Here hugging my daughter.
5. You're allowed to bring guests for as long as there's space in the van. At this point of the activity it would be nice to get a hug from your loved one.
6. Next, you board the plane, and it takes off.
I try to put on a brave face, but I am nervous as hell.
That, my friends, is the face of fear.
7. There are no toilets in the small plane. So if you have to pee, then you better hold it in. The plane will take around 20 minutes to climb to the right altitude. This is the most nerve-wracking part of the activity. The wait and anticipation just kills you. You'd like to back out but it's too late because the instructor has attached his harness to yours. There is no backing out.
8. When you reach the correct altitude, they open the door and out you go. Everything happens so fast, the next thing you know you're accelerating 0 to 200 kph in 8 seconds, which feels like going down a roller coaster, and then you free fall. 
9. In free fall, you don't feel like falling anymore. It's what you feel when you put your hand out of the car while it's moving, only instead of just the hand, it's your whole body. You feel the wind blowing all over you and it's like you're floating.
10. At this point, you won't feel scared at all. The trees and rivers look so tiny. Skydive Auckland explains that above 5,000 feet, people have no perception of height. So just enjoy the fall.
11. When you reach 5,000 feet, the instructor pulls his cord and opens the parachute. There is a slight jerk, but nothing to be worried about. If weather permits, the instructor will let you steer the parachute for some time. The glide down to the drop zone will take around 5 minutes. Enjoy the view.
12. Before hitting the ground, the instructor will tell you to lift you legs up, you do as he says, and you land softly on your bum. Congratulations! You just completed your first tandem skydive!
So, there. I hope I inspired you. If you're in New Zealand and skydiving is in your bucket list, I highly recommend doing it here. You can skydive in Auckland like I did. But I suggest either Lake Taupo or Lake Wanaka for the better views.

And remember these tips!

   Tip 1: Prepare for at least 2 days for this activity, as it is weather dependent.
   Tip 2: Check out for deals with BookMe.
   Tip 3: When making a booking, ask if there's space for your guest in the van.

Sunday, August 3, 2014

Watched a Rugby Game (NZ vs England)

Since I came back for a second year of postgrad here in New Zealand, I told myself I'd do the other things I wasn't able to do in my first year. And watching a rugby game was one of those things.
So the minute I found out England was coming over to go up against the All Blacks, I immediately bought my ticket online, even if the game was two months away. It's the All Blacks, for Chrissakes! The reigning rugby world champions!
I convinced other scholars to watch with me and we attended the June 7, 2014, friendly match between England and New Zealand. The game was held at Eden Park in Kingsland, a short train ride from the CBD. The stadium was packed. The announcer said there were 47,200 rugby fans in attendance.
I don't know if it was the excitement or the venue, but I felt the game went by so fast. The two halves run 40 minutes each, with a 10 minute intermission in the middle. I've never watched a whole game before, and I hadn't played it, so I was guessing the entire time. I know the goal was to carry the ball to other side and score a try, which is 5 points. A team is given six attempts to so. If it doesn't--meaning to say, the other team effectively stops them from scoring, then they can kick the ball into the goal post for 3 points. That's all I know. 
The game wasn't as action packed as I hope for. I expected it to be like American football with lots of long throws and catches, and tackles and dives. But most of the points scored for this game came out of boring field goal kicks. There was only one try scored, and it was in the last few minutes. And I can only assume it's because both teams had good defense, that either side found it difficult to score against the other. Anyway, what do I know?

The point is to get to experience this when you're here. Rugby is New Zealand's national sport, much like basketball is in the Philippines. And this game against England is like Team USA playing Smart-Gilas at the SM Arena. It's worth going to. Andito na rin tayo eh, di ba? I probably won't watch another live rugby match again in my life.  

Oh, by the way, New Zealand won 20-15. :)

Thursday, May 1, 2014

Dressing up for Graduation

If you are attending your graduation at the University of Auckland, you either rent or purchase your regalia at Academic Dress Hire. You rent if you will just wear it during graduation day. But if you're like me, who teaches in university, it's an investment to buy the regalia. 
Academic Dress Hire is located at 17 George Street, Parnell--just across the Auckland Domain Cricket field. You can take the Inner Link or Outer Link buses and get off at the 540 Parnell Road stop.
You can actually order your regalia in advance at the foundation's website at Academic Dress Hire. It's easy to navigate. And there's a variety of options to pay. Credit card, debit, bank transfer on-line, or cash and eftpos on-site. The people who work and volunteer for the foundation are very nice, helpful and friendly. Word of advice, though, don't wait til the last minute to go, because the line gets long. Best to go at the earliest possible time, and avoid lunch time.
Auckland University uses black gowns. The gowns are $38.00 to rent, and $250.00 to buy.  Trenchers are $21.00 to rent, and $65.00 to buy. Thank God, I brought my UP Law gown and trencher. Saved me 60 bucks!
The different colors of bachelors hoods. They are $21.00 to rent, and $85.00 to buy. I will be using my UP Law hood for this graduation.
Of all colors, Arts courses were assigned the color pink! Hay, buti pa yung science, blue. Here are the different diploma scarves on display. They are $21.00 to rent and $85.00 to buy. I bought this one. So I can use it during graduation ceremonies in the Philippines.
Here are PhD gowns and hoods. I have no interest in taking a PhD. A masters is fine... for now.
And this is me wearing my UP Law gown, Auckland Uni PGDip scarf, and Auckland Uni MPP hood. Yes, I'm wearing a black baseball cap to my graduation... Kidding, of course.
This is unique to New Zealand. It's the Korowai or the Maori cloak. I guess you wear it in addition to the regular regalia if you are Maori or have Maori blood and heritage. The cloak is worn over the gown and to the Maori, symbolizes honor and prestige.