Monday, December 15, 2014

Doing an Internship at an MP's Electorate Office

Having a legal and legislative background, I was lucky enough to get an internship with a member of parliament here in New Zealand as part of my masters. I interned at an electorate office (a legislative district office if in the Philippines) in Auckland from July to October 2014. In the three months that I worked there I learned a lot about constituent relations, legislative work, and general political life in New Zealand. I count myself extra lucky because I did my internship on an election year. Over all, my experience was eye opening, enriching, and educational.

The electorate office I worked for had a regular staff of two electorate agents. On my first day, we were the only ones in the office. There were no visitors. And this was my first observation on the difference between Philippine and New Zealand political life. Back home, a legislative district office of a congressman would be full of local politicians and constituents as soon as the office opens. Town councilors and community leaders would ask for political favors such as a government post for a friend or relative, while residents would ask for financial assistance to pay for hospital bills, burial expenses or both. As a former local legislator myself, I could not concentrate on my law making duties because of these office visits and favors. So it was refreshing to see a quiet electorate office absent these distractions. I learned that MPs in New Zealand accede to more reasonable and relevant requests such as making private queries and raising matters in parliament. I found out that MPs rarely provide financial assistance to their constituents. NZ electorate office services, I learned, were limited to letter writing on behalf of constituents for tax problems, welfare benefit issues, and ministry of immigration, health and education concerns. And these are exactly the kind of things the electorate office staff had me work on while I was there. I researched and drafted memos on issues concerning employment, fishing quotas, legal aid debt, and the child support, to name a few.

I also observed that an MP’s electorate office is sparse and simple compared to the ones back home. The two regular staff had their own desks, and there was another room with a meeting table. That was it. The MP didn’t even have a desk of his own. In the Philippines, the congressman would have a separate waiting area for visitors alone, and in addition, his private room. At the electorate office, since they didn’t have a desk for me, I worked by the meeting table. When the MP was present, I would work at the stock room beside the office.

On slow days, like when there were no visitors and the MP was out of town, I’d ask the two regular staff more about parliament work and life in New Zealand. I had an idea of the MMP (Mixed Member Proportional) system. We also have party-list members in the Philippines. But I learned that one major difference is that MMP rules permit a defeated candidate in the electorate vote to still get a seat in parliament under the party-list system. This is not allowed in the Philippines. A district candidate cannot cross over to the party-list.

As I earlier noted, the internship also exposed me to New Zealand’s national elections. And it was such an eye opener. I found campaigning to be very laid back. There were a few campaign materials posted and I saw just a few campaign volunteers. May be it was laid back because my MP had held his seat for almost thirty years. But I noticed the same for other candidates. I think this is good as campaign expenses are kept low.

Like I wrote at the beginning of this essay, I learned a lot from the internship. It was eye opening, enriching and educational. The work experience exposed me to a mature and professional parliamentary office environment that will serve as an inspiration when I go back home.

NB: Due to a confidentiality clause in my internship contract I am unable to share the details of the MP I worked for.

Wednesday, November 19, 2014

Don't Forget to bring Vicks

Pag malamig ang panahon, napansin ko na mas madalas hindi naliligo ang mga ibang lahi dito. Alam ko kasi lumalakas ang baho at putok ang naamoy ko kapag winter. Lalong lalo na sa graduate computer lab namin. Pag summer o autumn, hindi ganun ka sama. Meron paminsan minsan may uupo sa tabi mo na may amoy, pero oks lang. Lipat ka lang ng computer. Pero talaga pag winter, yung buong lab mabaho. Kahit saan ka lumipat, amoy mo yung hindi pagkaligo, or worse, yung putok. Mahihilo ka ng di oras. Ang panangga mo sa B.O. ay Vicks vaporub. Pahid ka lang ng kaunti sa may ilong mo para hindi mo maamoy yung baho. 

Ayun lang. Payong kapatid. Don't forget to bring Vicks.

Friday, October 31, 2014

Bungy jumped in Queenstown

So I ticked off another item on my bucket list...
I was in Queenstown with my friends last September and they all wanted to ski and/or paraglide. But I already went skiing and skydiving before, so I wanted to do something different naman. And since commercial bungy jumping started out in Queenstown thirty years ago, I told myself I might as well do that there, right?
Anyway, I chose to jump with AJ Hackett Bungy. Their office is at the heart of Queenstown--Shotover corner Camp Street. When you get to town, you can't miss it. After registering and paying, they weigh you. And then you ride a bus that brings you to the jump sites.
My weight in red marker.
There are three options to choose from. First is the Kawarau Bridge Bungy. This is the first and original commercial bungy jump in the world. The drop is 43 meters (roughly 140 feet)--the shortest among the three. If you're heavy enough, you can request to take a dip on the Kawarau river. Tandem jumps are also available. The next is the Ledge bungy. This site is located on top of Bob's Peak near downtown. The drop is 47 meters (154 feet), with a spectacular view of Queenstown and Lake Wakatipu. The third and highest bungy is Nevis. It is New Zealand's highest bungy at 134 meters (440 feet)! It's crazy! The jumping platform is on a cable car suspended from wires connected to two mountains. It is not for the faint of heart.
I chose to do the Kawarau Bridge bungy jump because of its historical significance (and because it was the shortest. Haha). But you can, if you want (and if you have money to burn) do all three jumps! They have combos for that sort of thing.
Once you get to Kawarau Bridge, you line up for your turn. Of course, while you're waiting, you see the other jumpers, and it all starts to sink in and it gets on your nerves--you're jumping off a bridge. You're jumping off a bridge! Yung nauna nga sa akin, parang mag-ba-backout na, so pati ako parang ayaw ko na rin. But the people working the bungy know what to do. They've seen countless jumpers get nervous and they're trained to calm people down. They chitchat with you so that you don't think too much about the jump. 
After the lady in front of me jumped, it was my turn. So what happens is you put on a harness around your waist and pelvic area--like the ones you wear when you wall climb. Then you sit down and they wrap a thick folded towel around your leg. When that's snug, they tie a nylon cord over the towel and around your leg until it's tight and secure. Afterwards, they clip you to the bungy cord. That's it. Ganun lang pala.
So that's Kawarau River. Look at that. What a beautiful view. I made the right choice when I decided where to bungy jump. I asked the guy who strapped me if I could touch the water of the river, because it's an option. Unfortunately, I wasn't heavy enough. Apparently you have to be 73 kilos or heavier to get the water splash. Sayang.
So after strapping you, the guy helped me get to the edge of the platform and say my goodbyes to the video camera. By this time I am nervous as hell. I wanted to back out, but where was I to go? My feet were already tied. Besides, it's non-refundable. So no choice but to jump.
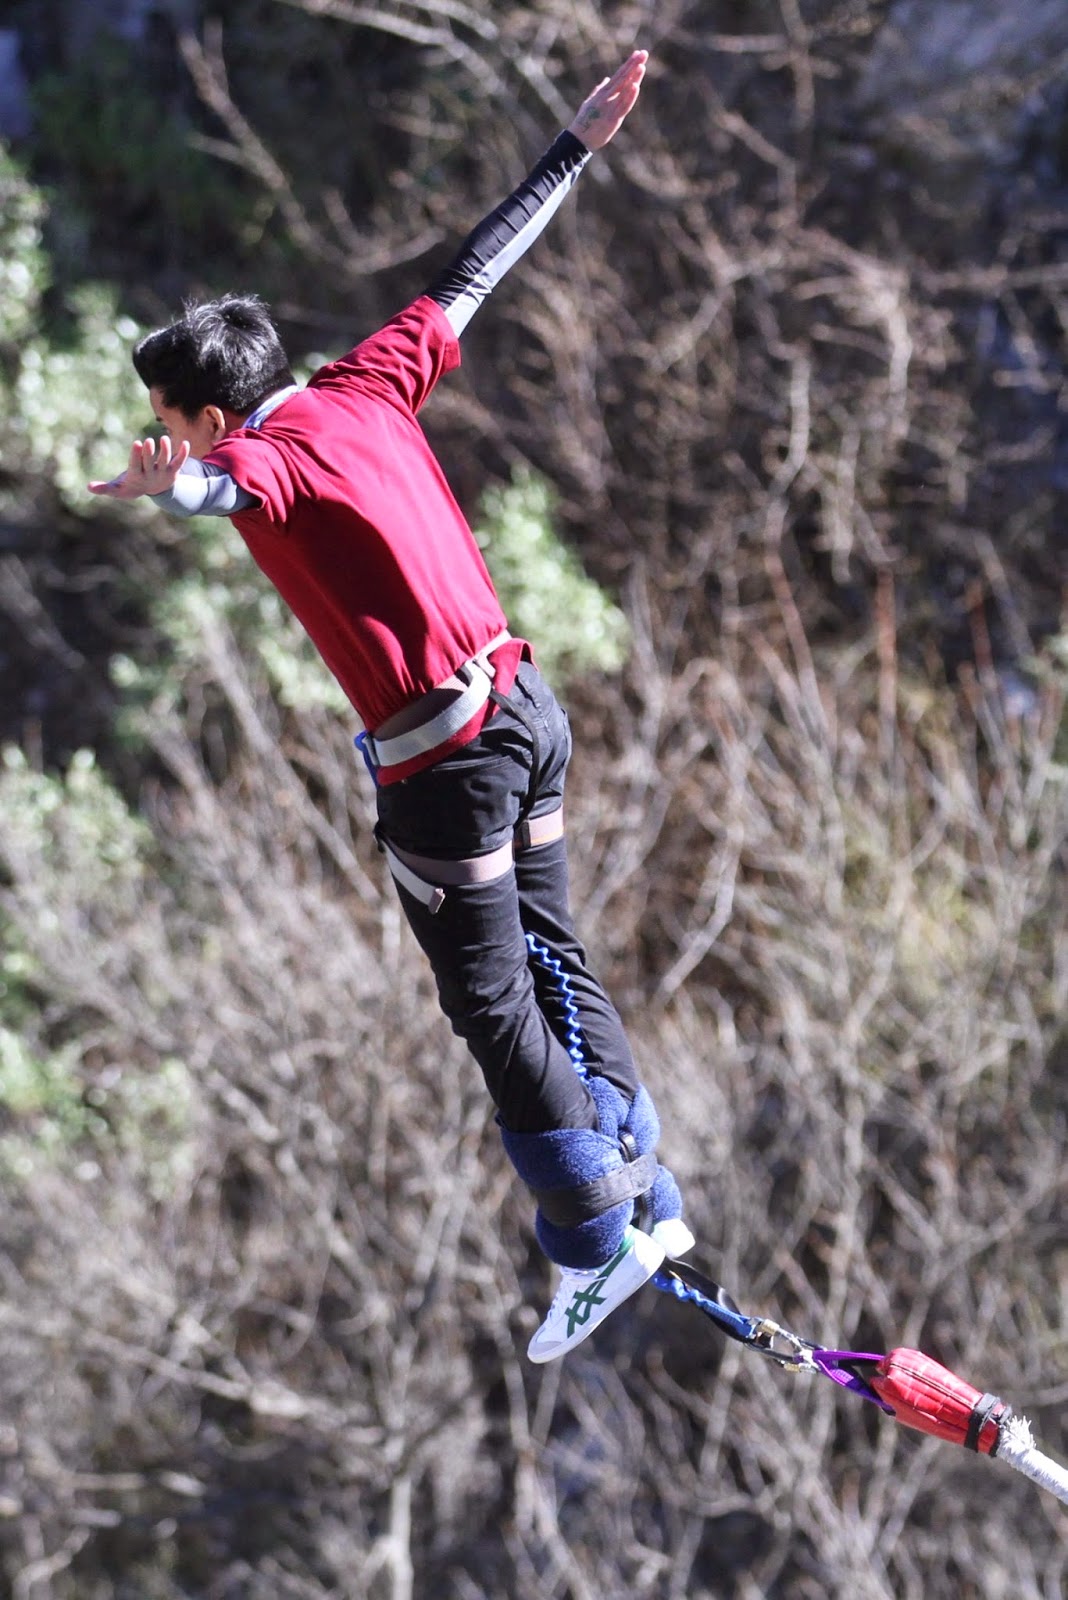
And so I jumped.
I thought I could get my bearing during the dive--you know, like Superman swooping down a building, but the jump goes by so fast. All I could see was a blur of bright sky, then blue water. 
Next thing I knew, I was swinging like a pendulum and worried I was going to hit the rock wall. Anyway, it was still exhilarating. Kahit na sandali lang yun, yung rush na tumalon ka from a bridge gives you a natural high. 
So what happens next? Well, you stop swinging. Then instead of pulling you right back up, there's a boat on the river that pulls you down. You grab on a pole and they lead you to the boat and unstrap you.
And that's that! 

Bungy jump, checked!

If you ever find yourself in Queenstown and have time (and money) to spare, I recommend to do it. I know it's also on your bucket list. Don't lie. You might as well bungy jump where it all started, right? And the views are not that bad. :)

Thursday, September 18, 2014

Skydiving in Auckland

Skydiving was on my bucket list for the longest time, and where else better to do it than in New Zealand, right? I did mine with Skydive Auckland late last year (2013). I originally planned to do it in Lake Wanaka near Queenstown, but it got cancelled twice due to strong winds. So that's my first tip. Skydiving is a weather dependent activity. You have to reserve at least two days for it. If it gets called off on the first day, at least there's another opportunity for it the second day.

Skydive Auckland offers three heights. 9,000 feet that gives you 25 seconds of free fall; 13,000 feet which gives you 45 seconds of free fall; and 16,500 feet which gives you 70 seconds of free fall. I chose to jump at 13,000 feet. The standard price is NZ$325, but I got mine at a discounted rate of NZ$255 on BookMe so I suggest you regularly check their page for deals in case you're interested on jumping with SkyDive Auckland.

Exclusions
Unfortunately, skydiving is not for everyone. It is not recommended for those with any of the following:
a. Pregnant
b. Scuba dove the last 24 hours
c. Nasal or sinus congestion
d. Have a cold or flu
e. Have problems equalizing pressure in ears
f.  Severe motion sickness, asthma or allergies
g. Heart conditions or epilepsy
h. Shoulder, knee, back or neck injuries

Step by step
So what happens when you choose to tandem skydive? Well, here's my experience.
1. First, you are led to the briefing room where they will play an instructional video. The presentation will, among other things, teach you how to position your body when you jump from the plane.
2. Next, they will measure your weight.
3. Afterwards, you put on a jumpsuit.
4. And then, your instructor will assist you in gearing up. He'll help you put on the harness and give you your hat and goggles.
Here hugging my daughter.
5. You're allowed to bring guests for as long as there's space in the van. At this point of the activity it would be nice to get a hug from your loved one.
6. Next, you board the plane, and it takes off.
I try to put on a brave face, but I am nervous as hell.
That, my friends, is the face of fear.
7. There are no toilets in the small plane. So if you have to pee, then you better hold it in. The plane will take around 20 minutes to climb to the right altitude. This is the most nerve-wracking part of the activity. The wait and anticipation just kills you. You'd like to back out but it's too late because the instructor has attached his harness to yours. There is no backing out.
8. When you reach the correct altitude, they open the door and out you go. Everything happens so fast, the next thing you know you're accelerating 0 to 200 kph in 8 seconds, which feels like going down a roller coaster, and then you free fall. 
9. In free fall, you don't feel like falling anymore. It's what you feel when you put your hand out of the car while it's moving, only instead of just the hand, it's your whole body. You feel the wind blowing all over you and it's like you're floating.
10. At this point, you won't feel scared at all. The trees and rivers look so tiny. Skydive Auckland explains that above 5,000 feet, people have no perception of height. So just enjoy the fall.
11. When you reach 5,000 feet, the instructor pulls his cord and opens the parachute. There is a slight jerk, but nothing to be worried about. If weather permits, the instructor will let you steer the parachute for some time. The glide down to the drop zone will take around 5 minutes. Enjoy the view.
12. Before hitting the ground, the instructor will tell you to lift you legs up, you do as he says, and you land softly on your bum. Congratulations! You just completed your first tandem skydive!
So, there. I hope I inspired you. If you're in New Zealand and skydiving is in your bucket list, I highly recommend doing it here. You can skydive in Auckland like I did. But I suggest either Lake Taupo or Lake Wanaka for the better views.

And remember these tips!

   Tip 1: Prepare for at least 2 days for this activity, as it is weather dependent.
   Tip 2: Check out for deals with BookMe.
   Tip 3: When making a booking, ask if there's space for your guest in the van.

Wednesday, September 17, 2014

Part-Time Work as a Teaching Assistant

Finally, on the last semester of my two-year masters, I got a job as a teaching assistant in the university. As I've written before, international postgraduate students on valid student visas can work in New Zealand. But whether there's work for you, now that's the question. Those with health, science, engineering and tourism backgrounds will find it fairly easy to find work here (a co-scholar who was a nurse immediately got hired at a hospital, while another Filipino scholar with experience in the hotel industry found a job at a service apartment). As you know, I come from the legal sector in the Philippines, and I found it extremely difficult to look for a job in my industry. For one thing, the law I know is different from the law they practice here. And for another, even if I did know their law, there's just not enough legal jobs for lawyers, at least here in Auckland. Siguro mas may chance pa sa Wellington, where the national government is based, but I digress.

I got this job because I received an e-mail blast a few months ago from the department coordinator announcing openings for graduate teaching assistants. And having been a college instructor back home, I felt this was right up my alley. So I filled up the application form, attached my supporting documents, and submitted them to the department. You get hired either as a tutor or a marker. A tutor teaches part of the course, while a marker checks coursework and other assessments. I signed up and got hired as a marker, which is supposed to be easier of the two. Pero hindi rin kasi mahirap mag-check ng essay. Hahaha.

But I'm not complaining. The extra income is good as it can supplement my stipend, and I  get to save some money for home. It's also a nice diversion to do something other than your studies and/or research--a job breaks the monotony of academic life. 

I only wish I knew about the GTA programme earlier in my studies. I could have been a tutor or a marker last year pa. So my advice, if you're like me who can't find a job related to your line of work in the Philippines, you might want to consider being a GTA. When you get here in New Zealand, look for and approach your department coordinator. Ask if there's an opening for tutor or markers. The chances are you're too late for that semester (as they hire prior to the start of the sem), but you can ask to be put on the mailing list. That way, the moment they open applications for the next semester, you'll be the first to know.

So, good luck! Hope this post helped!


Wednesday, August 13, 2014

5 Tips on Driving in NZ

I wrote about travelling in New Zealand in another post. It was mostly about getting around the city. You can survive your entire stay at uni by using the public transport system like the bus, train, and ferry, but if you want to explore the country, you'd eventually have to drive (or ride) a car. And after experiencing driving in Auckland, Wellington and Queenstown the past year, let me share with you some tips, just in case you find yourself behind a steering wheel. 

1. They drive on the left side of the road.

This is obvious. New Zealand follows the British road and traffic system where drivers drive on the left side of the road, not the right where we Filipinos are used to back home. This also means the steering wheel is on the right side of the car, and the gear shift is on the left of the driver. It takes a bit of getting used to, I perspired the first time I took the wheel even though it was freezing cold outside, but you'll manage.

The red car on the right has the right of way.
2. Give way to the car on the right when entering a roundabout.

Unlike in Quezon City Circle where drivers don't follow any rule when entering the rotunda, New Zealand traffic law requires a driver to give way to the car entering the roundabout on his right. Tatagalugin ko. Pag nagsabay kayong dumating sa roundabout, kung sinuman yung nasa kanan, siya ang mauunang pumasok. If you are unsure who came in first, best to just wait, turn your signal, and then proceed.

3. Do not slow down along curves on the highway.

In the Philippines, it's second nature for drivers to slow down when approaching a turn. Naturally, that's what I did when I drove up to Cape Reinga in Northland. Unfortunately, that pissed the drivers behind me as you are not supposed to slow down on the highway. Apparently, they expect you to keep you speed even though driving on a curve. Well, won't the car tip over? That's what I thought. I learned that turns on New Zealand highway roads are inclined to make sure cars don't tip on their side when approaching. So there, unless a road sign specifically indicates a slower speed, do not slow down on curves. Just maintain your speed.

Give way to incoming traffic.
4. Give way on one-way bridges.

For reasons eluding me, there are a lot of bridges on highways in the countryside that are single lane. Minsan napapaisip ako, naghihirap ba ang New Zealand at hindi nila kayang magpatayo ng two-way bridges? Anyway, the rule is to follow the road sign before the bridge. If you see a sign as shown above, that means you have to give way to the car approaching the bridge on the opposite side. If there's no sign, that means you have the right of way.

5. Flashing your lights does not mean, "I'm first."

Finally, be careful when flashing your lights. If in the Philippines it means, "Nauna ako dito, liliko ako, bagalan mo," it means the complete opposite here in New Zealand. In other words, if you flash your lights here, it means you acknowledge the other driver and you are giving way to him to make a turn and cross your lane (like on a signless intersection).


Note: Tourists and international students are allowed to drive in New Zealand for the duration of their visa, as long as they carry a valid drivers license from their home country and be at least 21 years of age.

Sunday, August 3, 2014

Watched a Rugby Game (NZ vs England)

Since I came back for a second year of postgrad here in New Zealand, I told myself I'd do the other things I wasn't able to do in my first year. And watching a rugby game was one of those things.
So the minute I found out England was coming over to go up against the All Blacks, I immediately bought my ticket online, even if the game was two months away. It's the All Blacks, for Chrissakes! The reigning rugby world champions!
I convinced other scholars to watch with me and we attended the June 7, 2014, friendly match between England and New Zealand. The game was held at Eden Park in Kingsland, a short train ride from the CBD. The stadium was packed. The announcer said there were 47,200 rugby fans in attendance.
I don't know if it was the excitement or the venue, but I felt the game went by so fast. The two halves run 40 minutes each, with a 10 minute intermission in the middle. I've never watched a whole game before, and I hadn't played it, so I was guessing the entire time. I know the goal was to carry the ball to other side and score a try, which is 5 points. A team is given six attempts to so. If it doesn't--meaning to say, the other team effectively stops them from scoring, then they can kick the ball into the goal post for 3 points. That's all I know. 
The game wasn't as action packed as I hope for. I expected it to be like American football with lots of long throws and catches, and tackles and dives. But most of the points scored for this game came out of boring field goal kicks. There was only one try scored, and it was in the last few minutes. And I can only assume it's because both teams had good defense, that either side found it difficult to score against the other. Anyway, what do I know?

The point is to get to experience this when you're here. Rugby is New Zealand's national sport, much like basketball is in the Philippines. And this game against England is like Team USA playing Smart-Gilas at the SM Arena. It's worth going to. Andito na rin tayo eh, di ba? I probably won't watch another live rugby match again in my life.  

Oh, by the way, New Zealand won 20-15. :)

Sunday, May 25, 2014

Majestic Milford Sound

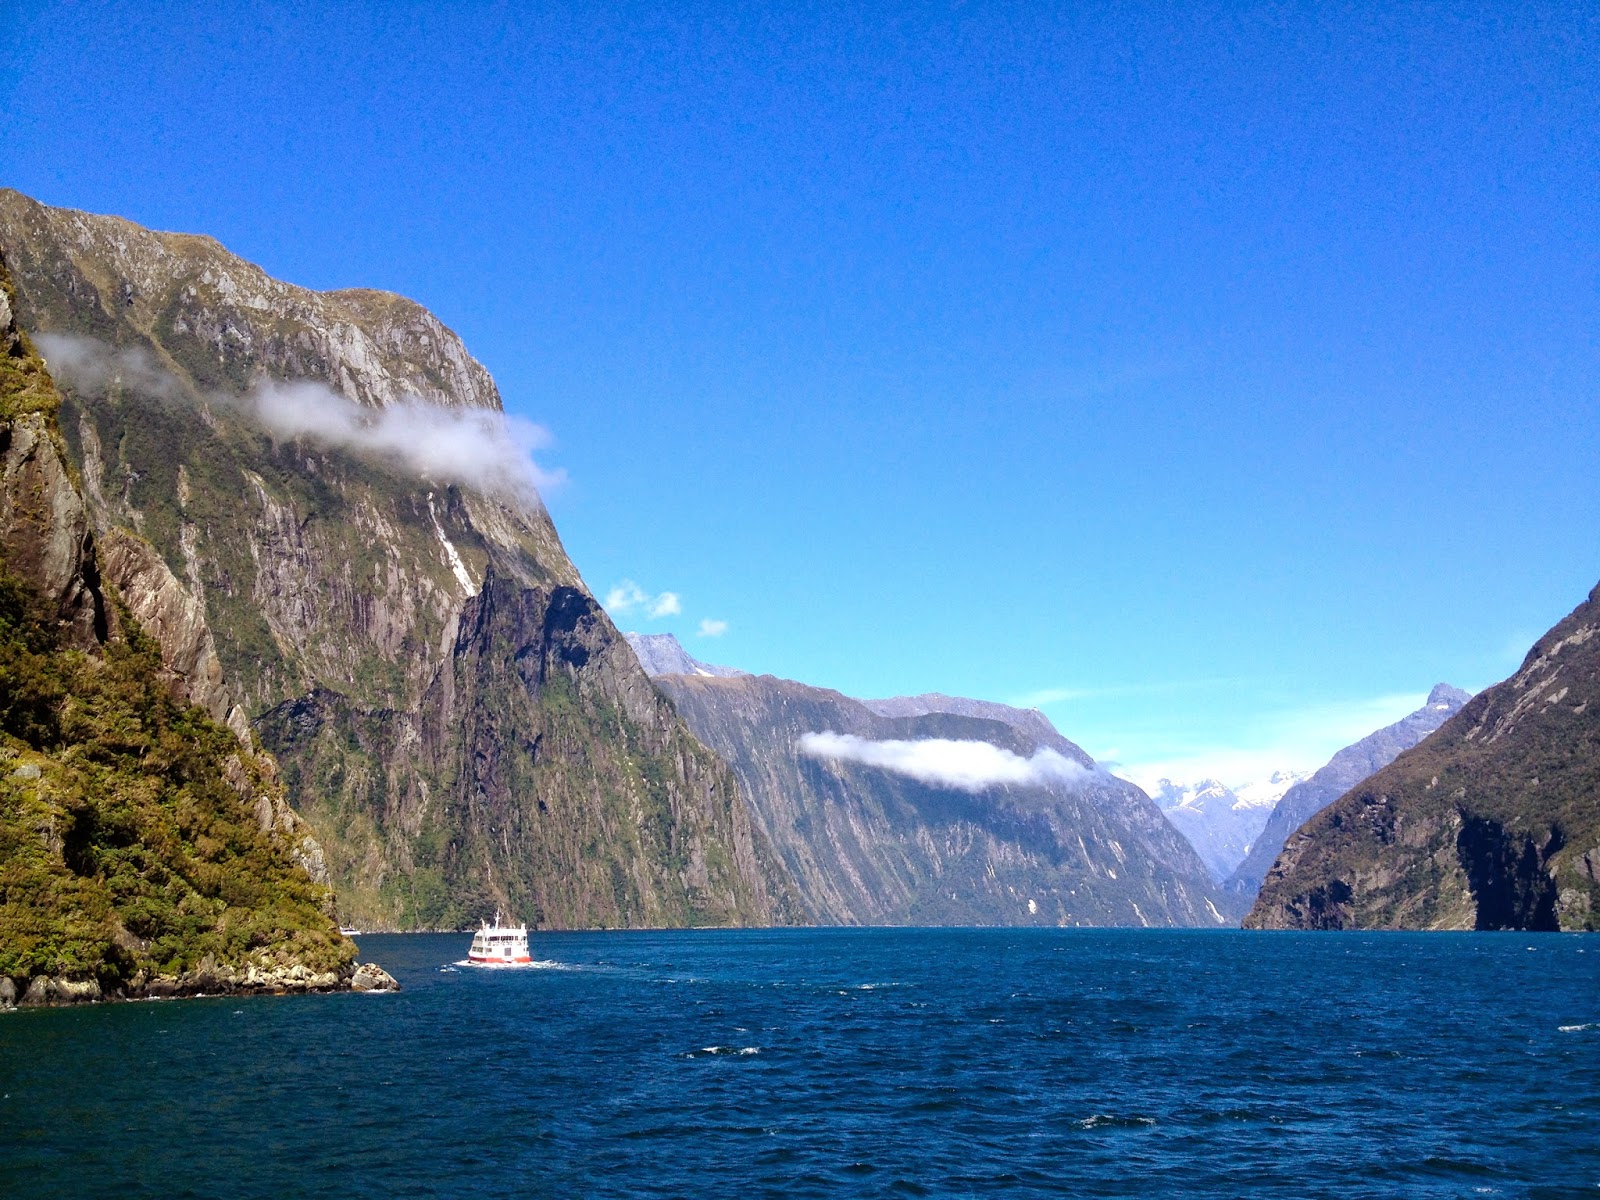
Milford Sound is a fjord. Uhm, not really helpful, right? Okay, a fjord is a long and narrow inlet with tall cliffs. And that's what you'll see when you visit Milford Sound in the south of New Zealand.
You can drive down to Milford Sound from Queenstown, if you want to, But my family and I decided to go with JUCY Tours. We chose the Coach-Cruise-Coach package (They also offer Fly-Cruise-Coach, but its crazy expensive). The regular rate is NZ$119/adult and NZ$75/Child (I know we got a discount on BookMe, but I forgot how much). Anyway, we were picked up by the JUCY bus at our place in Queenstown at 8 in the morning and then we proceeded to Fiordland National Park. 
The trip was long. 4 hours, I think, with lots of stops. This is me with my daughter posing next to a big statue of a Takahe bird at Lake Te Anau. The Takahe is a blue-colored flightless bird native to New Zealand. I saw a real Takahe at Zealandia Bird Sanctuary in Wellington a few months back.
This is another stop at Monkey Creek where the tour guide told us that the spring water was clean to drink. So, I filled up my water bottle. I made sure no one was peeing or washing clothes upstream.
We went in November, which is Spring in the Southern Hemisphere, so most of the snow has melted. But the mountain peaks were still covered in white, and they were still nice to look at.
This is the Milford Visitors Centre and Boat Terminal. From the bus, we got on the Jucy Ferry. There are other boat options like Mitre Peak Cruises and Southern Discoveries. 
Bowen Falls is one of two permanent waterfalls in the fiord, and is 160 meters tall.
There are several decks in the ferry. Of course, we wanted to stay outside and enjoy the views. Never mind the strong winds and freezing air.
Mount Kimberley on the left.
And those are the cliffs I was telling you about, which makes Milford Sound a fjord. I'm sorry, but these photos do not give them justice. The mountains are massive and very, very tall. Just look at how they make that ferry on the lower left look so tiny.
Stirling Falls
You get to see giant waterfalls as well. Since it was already spring, we just saw a few. The tour guide told us during winter there are literally dozens of waterfalls along the fjord.
Harrison's Cove
We sailed up to Dale Point, where the inlet meets the Tasman Sea. And then the ferry turned around and we went back to the harbour. Back on land, we transferred to our bus and headed home. Another 4 hour ride.
Map of Milford Sound. From the Jucy website.
It's a pretty tiring trip, especially if you travel with kids. The coach-cruise-coach package is jam-packed and will take the entire day. If you want to take it easy, you can opt to drive there in the afternoon. Spend the night at one of the inns, and then take the morning cruise the next day. When you get back at noon, you can then drive home.

The views at Milford Sound are majestic. If you like nature, like I do, then this is a must-do, especially if you're already in the area. But if you seek action and adrenaline-pumping adventure, then this might not be an ideal activity for you, because it's purely sightseeing.

TIP: Food is expensive at Milford, so better to pack drinks, sandwiches, chips and sweets for the trip.

Friday, May 9, 2014

5 Things To Do in Queenstown

Queenstown is beautiful. I visited the city in the south island with my family last November--in between spring and summer 2013. The peaks of the Remarkables mountain range still had snow on them and they looked majestic, I wondered how much more in winter.
Queenstown Mall
Queenstown is a quaint city. Small and compact. But don't let its size fool you. There are tons of stuff to do. The city was practically built for tourists. On every corner there are tourist signs to do this or that kind of adventure activity: from white water rafting, mountain biking, tramping (hiking), bungy jumping, sky diving, paragliding, zip-lining, sightseeing, you name it! They say it's the outdoor adventure capital of the world. We stayed in Queenstown for almost a week and it wasn't enough time to do half of the things offered by this city.
Next to the William Gilbert Rees statue. He founded Queenstown.
Anyhoo, I was with family, right, so I couldn't do the stuff that I wanted to do. We had to make sure most of the activities were child-friendly. But that's okay. I still had fun.
1. Ride on the TSS Earnslaw
We rode the TSS Earnslaw Steamship and crossed Lake Wakatipu to enjoy the Queenstown scenery. The boat is 100 years old and but its still in good running condition. There's a bar inside where you can enjoy your favorite drinks. You can also see the steam engine. In the alternative, you can go outside and just enjoy the view. The ride was smooth and pleasant. The 90-minute cruise is NZ$55 per adult. Kids (below 18 years old) are FREE--one of the cool things with NZ!
Ria and Bea feed the little lambs, little lambs, little lambs...
2. Feed Sheep on the Walter Peak Farm Tour
Ria and I chose to take the TSS Earnslaw-Walter Peak Farm Tour bundle. You ride the steamship to cross Lake Wakatipu. Then you disembark at Walter Peak station and take the farm tour. It's a nice way to introduce your children to farm life in New Zealand. My daughter Bea fed some lambs with milk. She also got to feed Red Deer and Scottish Highland cattle.
Afterwards, they staged a dog show--well, sort off. They show us how dogs help the farmers by rounding up sheep to their pens. Ang galing ng mga aso. And then later the tour guide showed us how to shear sheep. It is a dreadful sight. The sheep was screaming and struggling--it was painful to watch. Bea got concerned and I had to explain to her that the sheep was doing okay. The TSS Earnslaw-Walter Peak Farm Tour bundle costs NZ$75 per person. Again, Kids go FREE!
3. Ride the Luge at Skyline Queenstown
My family and I went to Skyline Queenstown on top of Bob's Peak, 450 meters above Queenstown. To get there, you have to ride a gondola (cable car). Round trip ticket costs NZ$27. Kids (5 and below) are FREE!
On top, you can walk around the garden/park and enjoy a breathtaking view of Queenstown, Lake Wakatipu and the Remarkables. Skyline has a restaurant and a bar. They also have a Maori Haka show, but that's too touristy for us. The activity most people do over at Skyline is ride the luge. It's the same kind of go-carts they have over at Sentosa Singapore, but with a much better view. I almost fell because I took my eyes off the road. Ang ganda kasi ng view.
Are you ready, dear?
4. Paraglide from Coronet Peak
I said we mostly did child-friendly activities, right? Mostly. I mentioned Queenstown is reputably the outdoor adventure capital of the world also, right? So we can't visit it without doing something adventurous. My wife signed up to paraglide from Coronet Peak. We were picked up by the tour operator in the city and driven to Coronet Peak Ski Field. Then everything happened so fast. The paraglider guy set up the chute, attached it on himself and Ria, and then they ran off the cliff! As Ria screamed on her way down, Bea and I rode the van to the drop zone. Ria said she enjoyed it. The standard price for paragliding is NZ$189 with photo CD. I suggest to score for deals on discount websites like BookMe or GrabOne.The tour operator we got also offers hang gliding.
5. Ride a bike along Lake Wakatipu
Another adventure activity popular in Queenstown is mountainbiking. You can bring you own bike, but there are many bike shops in town that rent out all kinds of bikes. I rented a bike with a child seat so Bea could come along. We biked on the trail next to Lake Wakatipu and it was awesome. I got to talk to my daughter about nature, the mountains, the lake, her being a passenger and me being the driver--you know, 4 year old kind of conversation. Great bonding time with the kiddo. I don't exactly remember how much I rented the bike, I think $20 for 3 hours, I'm not sure. Basta, it was reasonable. If you're going to rent a bike on your trip to New Zealand, I suggest to do it in Queenstown. Fantastic views. You won't regret it.
Not on the list because it's not an activity, but still worth mentioning on this entry is taking a visit to Arrowtown. It's a small town, just outside Queenstown, which was the birthplace of the New Zealand gold rush of the 1800s. It's a historic place and authorities tried to preserve its gold rush charm. It actually looks like one of those towns you've seen in Old Western movies like Wyatt Earp. Not really a must-visit, but nice place to go to if you have time to spare.

There are several other things to do in Queenstown that we weren't able to do, which was a bummer. But I guess it just means, it's a reason to go back.